Overblog
Suivre ce blog Administration + Créer mon blog

dessert

Making an American Apple Pie and Recipe

Publié le par Charly C.

Hello World~~~

Happy new year as well!

It's been a long time since I last shared a recipe with you. The last recipe i shared here is from June '21.

In fact, i haven't made this pie in a very long time. This recipe was originally posted on my cooking site/blog in 2014. That's where it all this obscure blogging journey started.

This recipe was first shared in May of 2014, but now i re-share it in mid-winter, aka January 2022. 

Sure pies are best enjoyed in autumn with fresh, local fruits. However, I find it a shame not to enjoy an apple pie at any time of the year if you think the apples are affordable enough. Plus, a homemade pie is better than any other sweet, isn't it?

If you want a Romanian apple pie, you might be disappointed. I know I am, unless some relative of somebody I know makes it. 

I knew the recipe for some time now, I even tried it out a few times before posting it. Why didn't I share it? To be honest, i have no idea why. my original reply was due to its square shape. This sounds very silly right now. 

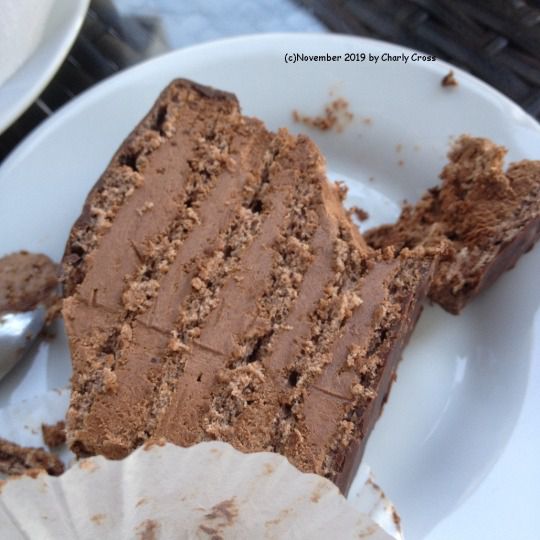
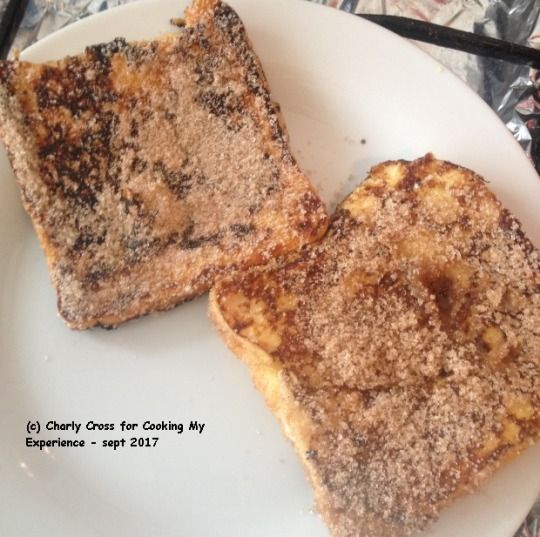
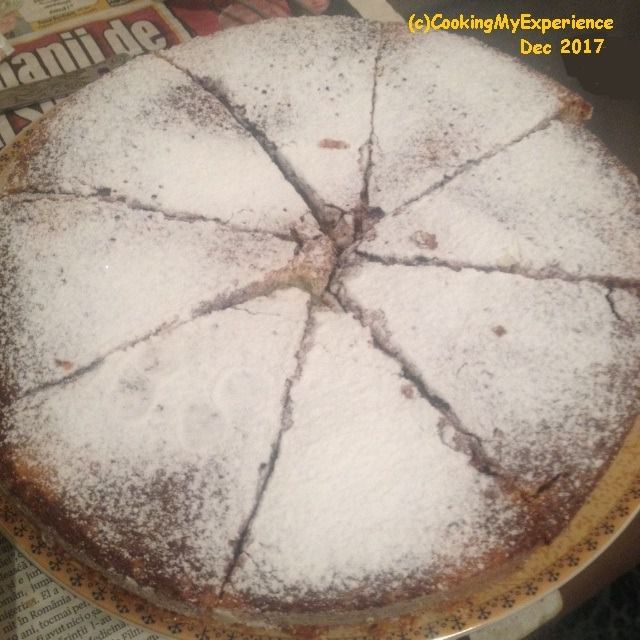
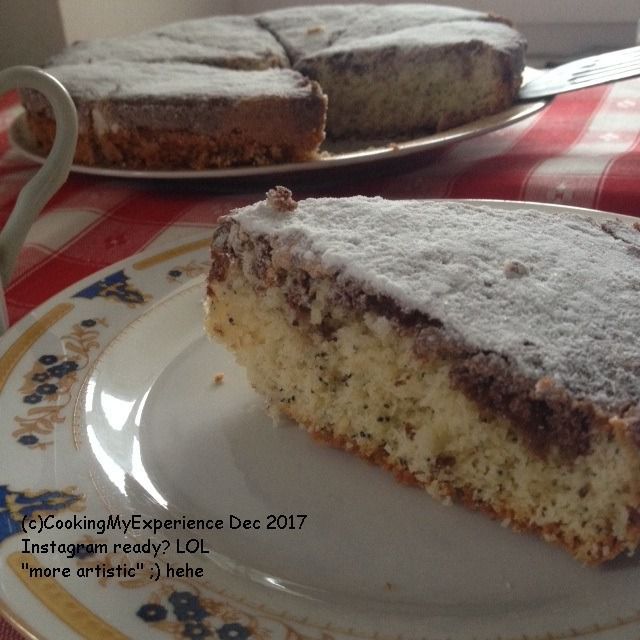
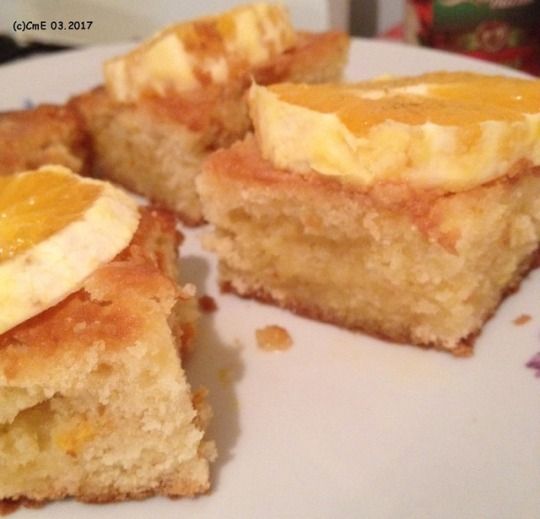
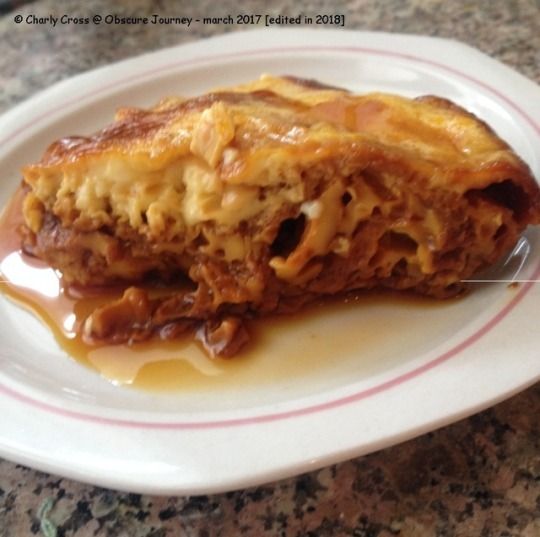
I'm not sure why many places sell squared apple pie slices, most likely because they bake rectangular pies. I asked my friend to take a picture of a slice of pie, so I can share "my own" picture.

I'll have to make this pie again, to take more and better pictures of it. 

apple pie slice with cream on top on a white plate

Brown sugar is rather expensive here, and I didn't have it on hand. Maybe I will in the future if anyone will ever want me to cook for them and to pay me. ;) I may have altered the recipe a bit, but in my opinion, it only added to its taste. 

INGREDIENTS:
  • 1 Kg apples
  • 150 g caster sugar
  • 1-2 pinches salt
  • 1-2 teaspoon(s) lemon juice
  • 1 spoon of (all-purpose) flour
  • 145 g (1 cup) raisins
  • some cinnamon
  • pie sheets (or crust)
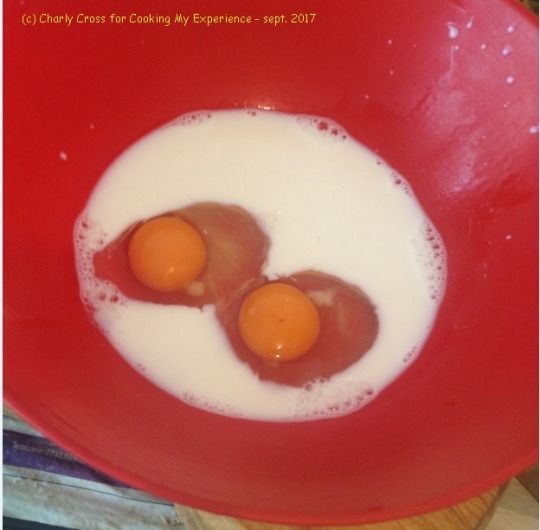
  • 1 small to medium egg

EXTRAS

  • any type of whipped cream
  • some vanilla sugar
METHOD:

Peel and remove the core from each apple. Slice them. Mix them with the raisins.

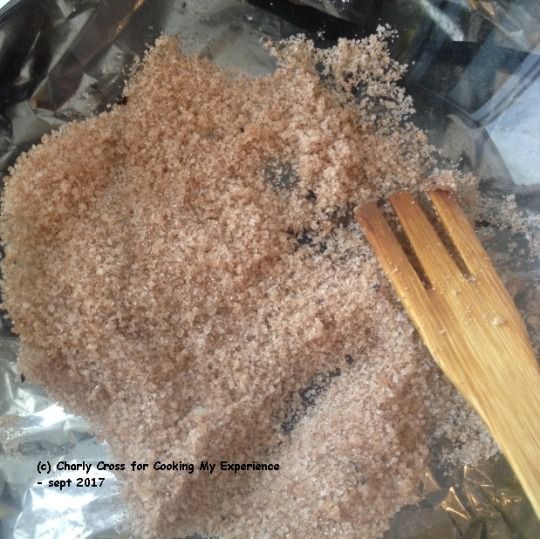
Mix the sugar, salt, flour, cinnamon, and lemon juice well. Include some vanilla sugar for more flavor.

Preheat the oven. Prepare your baking tray, however, you are used to. Place the pie sheets or crust onto the tray. Make sure you have some left to cover the top of the pie.

Pour the mixture over the apples, or the apples on top of the mixture. Make sure all slices get well coated with a sugary mixture.

Nicely place the coated fruits on top of the pie crust in the baking tray.

Beat the egg. Pour the egg on top of the pie and spread it well to cover the top using a kitchen brush. Sprinkle some sugar or some more vanilla sugar on top.

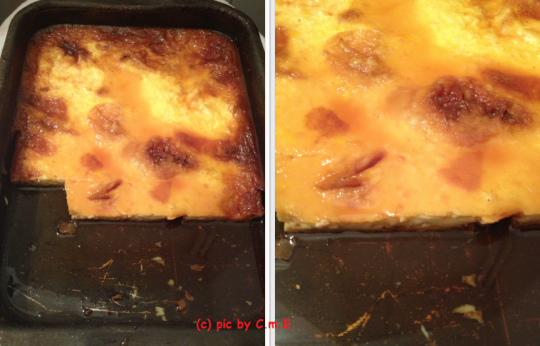
Place the pie in the oven and bake for 35 to 40 minutes. I baked mine for some 37 minutes on really low heat.  When it's done, remove it from the oven and let it chill. When it's chill enough put it in the fridge till you're ready to serve.

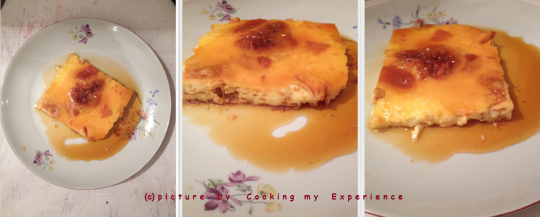
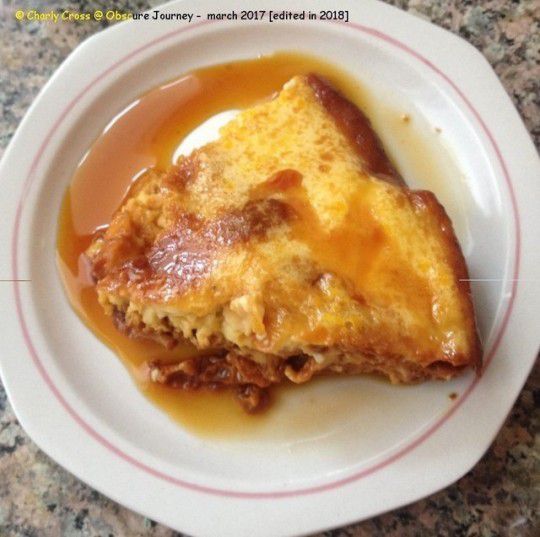
When you serve, decorate with some whipped cream or ice cream, maybe some cinnamon, and whatever else you think might taste good. And, of course, don't forget to slice it up as well. 

NOTES:
  • I use a gas oven, with real fire. The fire was on its lowest, but I preheated it for a longer time than I intended.
  • I used whipped cream powder that I had to beat with milk. Water is also good, as it makes the cream lighter and less nauseous.
  • For me, many sweets and foods taste better when they're cold. The pie is one of them.

Bon Appetit!

©Charly Cross 2013 - present. All rights reserved. 

Voir les commentaires

Cat-shaped "minciunele"

Publié le par Charly C.

Hello, world! 

Today I'll share with you my results trying to make a common Romanian dessert, called "minciunele." This word means little lies and they're a type of donuts. 

As you can see from the pictures, this recipe was supposed to appear quite some time ago. In fact, i had already posted this recipe on my first blog, before i rebranded for the first time. 

When I first started blogging, I thought i'd have a cooking blog and another blog for other stuff. As we all know, things changed, and now i have this "general" blog and my site/blog dedicated to reviews, called Being Obscure, hosted by WordPress. 

The recipe goes something like this, and you can see the original recipe and results here. This is the blog dedicated to recipes for Romanian foods. The post shows you how these are supposed to look like, and you can clearly see my cats don't look as nice as the original. 

If you want to know why i chose to shape my donuts as cats, I'll add the story AFTER the recipe. I recently realized people don't appreciate too much talking BEFORE the recipe. So, without further ado, here we go!

Ingredients:
  • 500 g flour (1lb?)
  • 2 eggs
  • 2 yolks
  • 2 tablespoons of sour cream
  • 1 teaspoon of baking powder
Additional ingredients:
  • some powdered sugar for coating
  • some sunflower oil for frying; whatever other type of oil you use for frying food should also work. 
Method:
  • Beat the egg whites until they're fluffy.
  • Mix the egg yolks with the sour cream and gently fold this mix into the egg whites. 
  • Sieve the flour and the baking powder on top of the mix.
  • Gently fold these also into the mixture above, until you have a smooth dough. 

The original recipe doesn't say to let the dough rest and raise a bit, so I didn't do that. However, I think it should be done, and i think it should be at least 30 minutes. 

Roll the dough onto a sheet on the work table (about 5 mm or 2/8in thick) and cut your shapes. Of course, you can cut whatever shapes you want - i also did that. 

To cut shapes you can use cookie cutters, a glass, or directly a knife. The difference is that with the knife things will be easier and much faster, while with the cookie cutters/glass you'll need to reroll the dough. You don't want to waste all that yumminess. ;)

Fry your shapes in hot oil, over medium heat, and on both sides. If you have too many donuts and you run low on oil, add some more oil, and make sure it gets hot before you fry more donuts. 

When they're brown on both sides, remove them and place them on a plate or a bowl covered with some paper towel or (unscented, dry) paper handkerhiefs. The paper will absorb the excess oil. 

In the picture above, you can see I'm frying donuts in other shapes than cats. 

Once you're done frying all the dough, sprinkle some confectioner's sugar on top. These are always better with some of that on top. 

I never tried, but these could also be good with some chocolate or cream on top. 

Bon Appétit! Enjoy!

Why cat-shaped?

I believe that at some point in 2017, the butter we usually buy came with a little cutter. There were 3 shapes: cat, car, and i forgot what else. They were meant to help mothers make cute sandwiches for their kids, to entice them to eat and enjoy the food more. 

I got the butter that had the cat-shaped cutter. I never really used it since, but one day, when i made these donuts, Anna jokingly challenged me to make them look like cats, thinking it would be impossible for me to do so. 

The expression on her face when i pulled out the cat-shaped cookie cutter? PRICELESS! 

So, this is how you make another type of easy doughnuts. i hope you liked the story about the cookie-cutter shaped like a cat as well. 

As a reference, i have 2 more cutters for cookies: one shaped like spectacles and another shaped like lips. These are from H&M Home. I got them on sale, i think right before the SHTF last year. 

The yellow disk is a cookie or cake decorator i found in the lid of a jar of Nutella. I forgot the year. maybe 2019. 

See you next time! 

© Charly Cross 2013 - present. All rights reserved.

Voir les commentaires

Fool proof doughnuts

Publié le par Charly C.

Hello world~~

DISCLAIMER: This article was originally published back in 2013. I edited it once, to add another picture, because i though the presentation lacked a little. Now, in 2020, i remade these doughnuts, and i took more pictures. I want to add them here, so this means this article will be republished. 

My friend showed me the recipe for these doughnuts on a local website and since I had all the ingredients, I figured I should try it out.  

The best part is that they’re done so fast, you don’t need to wait for the dough to raise,  and they’re very yummy and light! You’ll want to double the quantities the 2nd time around, hehe ;) 

You probably won’t believe me, but even a 14 year old boy made these, or it was him sharing the recipe.

The pictures in this article/recipe are mine.


The original, sad picture i used. oh, gosh.

The original, sad picture i used. oh, gosh.

INGREDIENTS

  • 200 grams yogurt
  • 1 egg
  • 3 spoons sugar
  • some baking powder
  • 1 pinch of salt
  • 150 grams flour
  • 1 Tbsp lemon peel – lemon essence works fine too.

I have to mention that this year we learned my friend can't eat a lot of things, including gluten, or at least not a lot of it.

So you can replace regular flour with gluten free flour or whole grain flour.

This year i also skipped the lemon peel (zest) or essence as well. Instead, i used vanilla extract. My friend was diagnosed with asthma, and lemon essence is bad for them, as some of you may know. 

I wish mine turned out this pretty :(I wish mine turned out this pretty :(

I wish mine turned out this pretty :(

METHOD

Mix all the ingredients together. Originally, I was supposed to add them one by one, but we want to be as quick as possible, even if we stay the whole day at home. 

Make sure everything is well incorporated though. The dough should be a bit thicker than the mayonnaise.  Thicker dough will make rounder doughnuts, while a thinner one will turn into funny looking doughnuts.  

I forgot to take a picture of the dough after i mixed it. Therefore, here you can admire my dough almost at the end. 

My dough was thicker, thus the doughnuts have a more regular, ball-like shape.

This is the time to adjust the sweetness, by adding more sugar if you so wish. Of course, this means you'd have to taste the dough. Make sure not to eat it all. Whatever you may add, incorporate well once again. It should be smooth. 

You can even add more flour, to make the dough thicker. IT should still be a bit runny though. My spoon is a hint to why.

At this point I added some grounded nuts back in 2013. - Side note: Reading this in 2020, i recall no such thing, but it must have happened. 

What mine turned out like :(

What mine turned out like :(

You'll now need a small pot or a frying pan. 

You need to have a thick layer of oil for frying in there. As you may know, doughnuts need to be fried. 

Heat the oil up. Don't use too much heat. I used low to medium heat. I kept it constant. 

Take a spoon, scoop dough out and drop it in the pan. You can fry more at once, depending on how big your pot or pan is. 

I could fit about 6 in my pan. It's normal for the doughnuts to have "legs" or whatever you want to call the little drops that fell from the spoon, next to the actual doughnuts.

The softer/thinner the dough, the more such "legs" will form. These "legs"are also a bit wasteful, because they get burned and nobody will eat them. I think i added more flour to make the dough thicker to have less waste.

You'll fry them on both sides, until they become golden/brown. They'll start floating at some point. That's when you'll turn them on the other side.

If you feel they become brown too fast, lower the heat a little. I cook with gas, so i can't really tell you how high my flame was. It was one of the largest burners, which was a bit too much for this smallish pan. 

You'll have to turn then around to check their color, to be even on both sides. 

When the first ones are done, remove them to a plate, or a large bowl. Make sure to use a paper towel on the bottom, as the doughnuts will still leak some oil. You don't want the ones at the bottom to sit in a puddle of oil, ewww. 

When you’re done frying all of them, just sprinkle them with confectioner’s sugar, chocolate syrup, or anything else you prefer for more yummyness.

Bon appetit!

© Charly Cross 2013 - present. All rights reserved.

entry edited in May 2018 first, then in 2020. all pictures are mine.

Voir les commentaires

3 Romanian cakes

Publié le par Charly C.

Hello World! 

The title says it all: today i want to show you 3 Romanian cakes. These cakes can be found in any cake shop and even at the supermarket. Or this was my experience so far.

If you ever find yourself in Romania, I think you should try these cakes, but try and make sure you buy them from a cake shop: they taste better there, for some reason, compared to the ones in supermarkets. Ana Pan is where you'll probably find the best tasting cakes, at least in Bucharest. 

i should mention that we do have many other types of cakes available, but i'll present the ones that are specific to Romania, and not imported. 

Ok, enough rambling: on to the cakes!


3 Romanian cakes3 Romanian cakes

Cartof Cake

This is a pretty simple cake, and easy to recognize: it looks like a cocoa ball. It's also covered in cocoa powder and sits prettily on muffin-like baking paper. 

Besides cocoa, it also contains raisins, rum, butter, and of course sugar. It has a moist texture on the inside, though it looks dry on the outside. 

"Cartof" actually means "potato" in Romanian, so i suppose the cake is meant to look like a potato, but it's just a ball. 

You can eat it with a spook or fork, or even directly with your hands, but holding it through the paper it sits on. 

I vaguely remember seeing log-like cartof cake. Besides the shape, there's no other difference. 

3 Romanian cakes3 Romanian cakes

Savarina Cake

This cake is pretty similar to choux-a-la-creme, I guess. 

This cake has a pretty big chunk of sponge-like cake as the base. I think it is baked in a muffin shape, given that it has some ridges on the upper part.

As you can see, they partially cut a slice on the upper part which they cover with a red jelly. They then use a huge amount of syrup, and then they add a good dollop of whipped cream. 

Unlike the choux cake, this one doesn't have any other cream nor pudding inside. 

While it also comes on some paper or cake cardboard, it's best eaten with a teaspoon or fork, off a plate. Some place now sell them in a small but deep enough plastic container, to avoid the syrup leaking everywhere. 

3 Romanian cakes

Excelent Cake

This is another chocolate cake. This layered cake has generous amounts of chocolate cream layers.

This chocolate cream is made with butter, and thus it can be quite heavy for the stomach.  

It's best using some tool like a fork or teaspoon to eat it, though eating with the hands is also possible. This is because it is also served on that specific cake paper. 

The chocolate cream on top and bottom is a different type. The one on top is probably ganache. The slices are about as thick as 2 fingers. 

© Charly Cross 2013 - present. All rights reserved.

Voir les commentaires

Watermelon granita

Publié le par Charly C.

Hello World~~~

This is a recipe perfect for a hot summer day - Watermelon granita! The recipe is not mine, I tried it and it's delicious! :)

  • Difficulty: easy!
  • Price: depending on how much the watermelon costs.
  • Servings: 4 people
  • Preparation time: 10 minutes
  • Cooking time: no cooking involved!
  • Refrigeration time: 3 hours in the freezer


Watermelon granita
Ingredients: 
  • 800 grams of chopped watermelon. I had a double quantity.
  • 3 tablespoons of lemon juice
  • 120 grams of icing sugar - I used 300 grams of caster sugar. Too much!
Method:


dice the melon and remove its seeds

dice the melon and remove its seeds

mash together the ingredients with a mixer, or a blender

mash together the ingredients with a mixer, or a blender

Pour in a  rather shallow bowl and freeze for at least 3 hours.

Scratch the granita every hour with a fork. -oops, I actually didn't do this.

Pour in some large glasses with a small mint leaf, and serve. I also didn't do this step. Mostly because I don't have mint leaves. 

Watermelon granita

Well, we drank it on the spot. it was crazy sweet. You might want to cut down on the sugar.

Bon appétit !

© Charly Cross 2013 - present. All rights reserved.

Notes: The recipe first appeared here [still my blog] But I found it on a French forum. The pictures are mine though. 


Voir les commentaires

Making French toast

Publié le par Charly C.

Hello World!

French toast is (or at least used to be) quite the popular dessert over here. I remember I watched a video last year in which the creator made them, so I suddenly started craving some. 

As you can see, I made this dessert last year in September, but I never got around to post the recipe. I think it's time to share this with the world. (and then go out to buy some milk to make another batch, haha)

Follow the pictures for ingredients and instructions ;)

In a larger bowl mix 2 eggs and half cup milk. Add 1-2 spoons of sugar if you want it more sweet.

In a larger bowl mix 2 eggs and half cup milk. Add 1-2 spoons of sugar if you want it more sweet.

On a plate mix together some sugar, cinnamon, and other spices you like.

On a plate mix together some sugar, cinnamon, and other spices you like.

Soak slices of bread in the milk mixture.

Soak slices of bread in the milk mixture.

Fry the soaked bread on a skillet that was just a bit greased. I used cooking oil, but they recommend melting some butter.

Fry the soaked bread on a skillet that was just a bit greased. I used cooking oil, but they recommend melting some butter.

Cook the bread on each side until they reach a light brown color. Then run through the sugar mixture.

Cook the bread on each side until they reach a light brown color. Then run through the sugar mixture.

You can now serve, hot or cold. You can serve with jam, syrup, honey depending on how sweet you want your dessert.

As you can see from my pictures, you can use any shape of bread, but it's best if it's white. 

I used real milk with a low fat content. While I think it's ok to replace it with soy or other type of milk, I haven't tried it. 

I recommend this as breakfast or as a quick afternoon snack, if you're at home. 1 serving shouldn't exceed 2 slices, and here I had maybe 8 slices of bread (but not all were shown). 

Voir les commentaires

End of the year updates and a recipe

Publié le par Charly C.

Wow, hello to whoever checks this out!

What are my updates? Firstly I hope my "cooking block" will stop and that I'll be able to share more stuff here. Well I do have a few recipes to share, and I can't wait to do so because I feel some of you did wonder if I'll ever post anything here or not.

Another update is that now I have an online identity, as you can see - points to the "author's name" and I hope that one day [in the next 5 years?] I will have a book published under this name.

It's a pen-name but I feel it represents me well [I feel no connection to my ID name, sorry parents]. The book I want to publish will be a collection of short stories - horror and fictional? is that what they're called? - that I'm yet to write. :P

not my picture :(

not my picture :(

I think you want the recipe more than anything, right? I wish there was a spoiler function for the other part.

marble poundcake with poppy seeds

End of the year updates and a recipe

This recipe is rather good for Christmas [or New Years] dinner [or lunch], so it came just in time. I have to warn you that I didn't follow any recipe this time, so you can refer to this one for specific instructions and more pictures.

I will however tell you the [approximate] quantities:

  • 2 eggs
  • 2 full table spoons of yoghurt [I used one with 1.5% fat content. Can be replaced with any fat percentage yoghurt, and even better, sour milk. ;) ]
  • 300 grams sugar [measured]
  • regular cooking oil [1 table spoon? I didn't measure it]
  • 10 grams of baking powder [most of baking powder in Romania comes in packets of 10 grams]
  • some orange essence [just because I didn't have vanilla essence. I didn't measure how much I used]
  • all purpose flour [not measured; enough to give the right consistency to the dough]
  • poppy seeds [I didn't measure, maybe 10 grams? a teaspoon? It's a very popular ingredient in Romania.]
  • cocoa powder, unsweetened [maybe 2 teaspoons?]
METHOD:

Preheat the oven. This is a step you can't skip, especially when cooking with gas.

This time, unlike other times, I just poured everything together in the bowl - except the flour, cocoa, and the poppy seeds. I mixed for some 20 seconds. I looked at the hour on my wrist watch for this one. ;)

Then I added in the poppy and the flour and mixed well. I prepared my round tray - maybe some 25 cm in diameter? and poured most of the dough in it. I saved maybe some 4 or 5 spoons in the bowl and added the cocoa powder.

End of the year updates and a recipe

I added the cocoa dough on top, trying to make some design - but you can't really see it since I didn't take pictures this time. I baked the cake for 45 minutes - 35 to 40 minutes would have been enough, but last times it was still underbaked [undocumented times] and I didn't want that to happen again.

When it finished baking, I just covered it in vanilla sugar and sliced it as you can see.When it finished baking, I just covered it in vanilla sugar and sliced it as you can see.When it finished baking, I just covered it in vanilla sugar and sliced it as you can see.

When it finished baking, I just covered it in vanilla sugar and sliced it as you can see.

I had my first try this morning, and I was pleasantly surprised and inspired to write this entry. YAY!

The coffee is from Japan, from the brand AGF Blendy. I have a Japanese friend and he kindly send me some Japanese coffee. I can barely read some hiragana and katakana... And although I started to learn some Chinese, it's definitely NOT enough to read the instructions. LOL

End of the year updates and a recipe

What can I say? This coffee was more bitter than life but really good :) The sachet in the cup was packed in the envelope I'm holding, and it smelled really good when I opened it. I added milk [off camera] to be able to drink it and also be sure I won't get shaky.

End of the year updates and a recipe

I hope you'll be able to try this recipe out.

I wish you Happy Holidays and lots of health in the upcoming year!

© Charly Cross 2013 – present. all rights reserved.

Voir les commentaires

Adventures in July

Publié le par Charly Cross

I actually wanted to have such an entry almost every month, but this wasn't really possible, especially if I had something else to say, or if I didn't have enough time.

Unlike July 2016, this one was quite full. I had a pretty big task to write at the beginning of the month, and then 2 smaller ones. Well, this is not really something you might really be interested in, so, no pics to show off.

I also managed to stick more to a posting schedule, all thanks to my bullet journal. If it looks messy, it's because I have yet to discover a journaling method that works for me. Or that looks less messy. An if you think this is not a proper bullet journal notebook, you're right: it is an agenda used as a daily planner with no monthly spreads, with dedicated pages for each day, so on. It might serve better as  a diary, if you were to write every day, a single page. I use the date written on the page, as page-number.

I was a beginner at bullet journaling. still am.

I was a beginner at bullet journaling. still am.

What stood out the most, was Ciel my pet crow being more active, coming to me to play, and all that jazz. I was really scared that he might be depressed, but I guess he's not. His favorite things to play with are items that are long and thin - line pens, pencils, drinking straws. He likes to play with pens so much, he learned where I keep them and goes to them to steal them. It's actually quite hilarious!

He knows which pens I don't want him to play with, and those are the ones he wants the most. Of course! Last night, when we returned from a stroll in the park, I found ALL the pens missing from their place, a bird dancing on the table, and the floor covered in pens. That was quite something to clean, HAHA!

This video is from the first day he started playing so much.  I thought he's hilarious! He would keep on coming back for more pens! And, yes, I have several looking identical, for no good reason.

We also went out to have ice cream. And we did it as often as we could. What you need to know is that we found a few places selling really good ice cream. For instance, Ana Baking has one of the best salted caramel ice creams! Guys! You HAVE to go there if you ever visit Romania. Just don't order coffee or coffee based drinks: our tasted like something nasty, and we won't get that again.

Adventures in July

Another awesome ice-cream we had was at this place called Caffeol. The ice cream came in a cone, dipped in a milkshake! We ordered the coconut flavor one which was inspired by the Raffaello bonbons. It even had one bonbon on top! Guys! One such drink is more than enough for 2 people! Sadly, if you want to order soy milk in your drink, you have to pay more :(

up close: Raffaello Maddness. picture by @calinescu_alexandru on instagram.

up close: Raffaello Maddness. picture by @calinescu_alexandru on instagram.

This place also sells some lemonades: some 5 flavors? there is classic lemonade, lemonade with melon, with strawberry, and I forgot what else. I managed to order a melon lemonade without lemon [say that 3 times fast!] and it tasted so good! It basically contains melon or strawberry, orange and lemon, so you can give up the lemon or orange if you really want. My partner has a sensitive stomach and citrus fruits, especially lemons are REALLY bad for their stomach.

that's one of their lemonades and a Snickers Maddness frappe. pic by @foodofromania on instagram

that's one of their lemonades and a Snickers Maddness frappe. pic by @foodofromania on instagram

Sadly I lost my pictures of the drinks, so I had to search them up. Caffeol has 3 locations: one in the Historical Center of Bucharest - where we went, one in Brasov and another one in Ploiesti. Check them out if you visit Romania!

We wanted to go to the pool, however we didn't manage to get around to it. Hopefully, this month, we will go there. The thing is, we have a couple water parks, and lake sides where we could go to swim or relax, however it is not safe to go there, health-wise. Those waters are not as monitored, and since so many people go there, the waters are more likely to be contaminated with all sorts of bacteria and viruses. Going to a pool club of sorts, is more fancy and safe as far as your health goes. Here are a couple of pictures from 2 years ago.

Adventures in July

This is actually a health center with a gym, sauna, swimming pool, and there is a restaurant as well. The place is located by a lake, but the pool is covered and not connected to the lake. It's really quiet and peaceful. Too bad the entrance fee is rather high in local currency.

This month also marked the first time I wrote something in Chinese, all by myself. I'm so proud of myself: I started studying Mandarin last year, but I was never consistent about it. However I do have something to show for it. Maybe I will post a separate entry with all the characters I DO know. Until then, this is what I wrote:

Adventures in July

 In all fairness, the "nice to meet you" line [the one before the short break] I wrote by looking it up and I have yet to learn how to say it without looking at the pronunciation. I can post a comment with the reading and translation if you want, just say so below ;)

There is one more thing that happened, right on the last day of July, but please stay tuned for that one, as I have a vlog about it. I will post it separately because this already became too long, and I need to write a few more explanations for the vlog.

Until next Sunday~~


(c) Charly Cross 2013 – present. all rights reserved.

Voir les commentaires

Poundcake with oranges

Publié le par Charly C.

My friend had this recipe for a cake made with natural orange juice and orange slices on top. The recipe is in Romanian, and I will try my best to translate it for you. Because you should try it the next time you want something different.

The recipe was recently found at the bottom of a drawer - it was being kept VERY safe as you can tell [aka we had no idea where it was]. I was cleaning that closet and the recipe resurfaced. yay! I don't have much to say at this point, so let's see what this cake is all about!

Poundcake with oranges

INGREDIENTS

 For the batter:

  • 175 grams [real] butter
  • 175 grams [caster] sugar
  • 2 eggs [beaten]
  • 225 grams all purpose flour
  • 2 teaspoons baking powder
  • 2 oranges [peel and juice] - see below
Poundcake with orangesPoundcake with oranges
  • 175 grams almonds [grounded] - I substituted with some almond essence
  • a pinch of salt

For the syrup:

  • 9 oranges
  • 100 grams [caster] sugar
  • 150 ml water

METHOD

Making the batter:

[disclaimer] the recipe said to mix all the ingredients at once. i didn't do that, because i know the consistency differs depending on how you mix them. so i will tell you how i mixed my ingredients. please use a mixer, and not a hand beater like i did [the cake turned out fine, just look at the pictures, but i don't think the ingredients ere mixed as they should have been.

1. Preheat the oven, prepare your baking tray, and make sure to have your butter at room temperature - it ill work faster this way.

2. Beat your butter and sugar together until you have a creamy looking mixture. My hand beater didn't manage to get the right consistency, luckily this didn't matter much in the end.

3. Add your beaten eggs, salt, baking powder, and orange juice and mix. Mine looked like this:

Poundcake with oranges

4. Add your flour, orange peel, and almonds and mix. This is what I had in my bowl at the end:

Poundcake with orangesPoundcake with oranges

5. Throw in the oven on medium heat till it's well done. Mine took about 40 minutes. I use a gas stove and oven, and this means I cook and bake with fire. I have 8 heat settings, from 1 [lowest] to 8 [highest] - I can make pizza on settings 6 to 7. I usually cook [in the oven] using the setting 3 or 2, even 1 - I feel the heat is too strong at 3. I baked this cake at setting 2.

Making the syrup!

1. Use a small pot. Place the sugar, water and the juice from 6 oranges in it, and on a small fire [low heat].

2. Mix until the sugar dissolves.

Poundcake with oranges

3. Leave it on the fire for 10-15 min, WITHOUT stirring. When it's done, you'll have less juice [syrup] left in the pot.

Assembling!
  • Peel your remaining 3 oranges and slice them.
  • Place your cake on something to cool down, for some 10 min. [I left mine in the tray, you'll see why]
  • Take a fork and pierce the surface of the cake a few times, in different places.
  • Pour your syrup over the cake [if the cake is in the tray, this step is less messy]
  • Place your orange slices on top of the cake.
Now, you can devour it! :DNow, you can devour it! :DNow, you can devour it! :D

Now, you can devour it! :D

Check out this close up!

Check out this close up!

My friend can testify this was moist, flavored, and out of ordinary delicious! Much better than any other cake I baked before. I must admit, this time I too liked the texture - I'm picky in this regard.

© Charly Cross 2013 - present. All rights reserved.

Voir les commentaires

Creme brulee or creme caramel..?

Publié le par Charly C.

Hello World~~

I realize I havent posted anything in a very long time, but this is due to more reasons. The main one is that I haven't cooked something worth sharing, nor something new.  If I did cook something different, I didn't take pictures, and recipes without pictures are boring and don't inspire anyone to try out the dish.

Yes, I remember baking a brownie with walnuts some 2 weeks ago. I found the recipe in a local newspaper, but brownie recipes are all the same. I hope to make it again soon enough and also take some pictures for you to enjoy. But, now let's return to today's recipe.

Creme brulee or creme caramel..?

What I wanted to cook was creme brulee, but I had ingredients for creme caramel...? Well, these 2 sweets are very similar, and to know which one is which, you better read this article because it explains things better than me. In the end, I think the result was a cross between these 2 desserts. In any case it was sweet, light, and with a consistency I liked.

I have used this pan a lot. The whole creme caramel was about a finger thick, though the pan is taller than that.

I have used this pan a lot. The whole creme caramel was about a finger thick, though the pan is taller than that.

Preparation time: some 15 minutes

Baking time: some 30 minutes

Cooling time: as long as possible, preferably in the fridge. I cooled mine overnight.

INGREDIENTS

For the custard:

  • 1 liter milk
  • 8 eggs
  • some vanilla essence

For the caramel

  • 250 or 300 grams sugar
Creme brulee or creme caramel..?

METHOD

First of all, you want to make the caramel. Pour all the sugar in a pot that can contain at least 2 liters of liquid. I used an oven pan of 20 x 30 cm, and some 3 cm deep? [I didn't measure it's depth, but it's pretty deep.] Make sure this is a metal oven pan because you'll place it on direct fire or heat before putting it in the oven.  Then you preheat the oven to medium heat. Place the pan on medium or fast fire, on the stove to melt and burn the sugar. Be careful how you handle the pan to avoid burning your hands or fingers. The sugar has to turn to a medium golden brown color. It doesn't matter if it turns dark brown because "brulee" means "burnt," so the color would match this description.

While you wait for the sugar to become caramel, beat the eggs in a large container, like for an omelet. Pour the milk and vanilla essence on top and mix. In fact, you can use any type of vanilla flavoring you like or have on hand. You can also use some lemon peel if you have, but not more than 2 teaspoons.

This slice is upside-down.

This slice is upside-down.

When all the sugar turned into caramel and covers all the bottom of your pan, pour the egg and milk mixture on top, and place in the oven. Bake on medium heat for some 25 or 30 minutes, but not longer. As the pictures show, mine got a bit too burned with these time and heat settings. Because you're using so many eggs and a lot of milk, it is best to overcook this dessert than to under-cook it.

Creme brulee or creme caramel..?

TIPS:

  • Let it cool completely before chilling it in the fridge. It tastes so much better the next day when it is really cold, like an yogurt.
  • When serving it, make sure to pour some of the brown syrup on top of the custard, because otherwise it will have no taste.

I hope you like this dessert.

Bon Appetit~~~

© Charly Cross 2013 - present. All rights reserved.

PS: post copied from the original CookingMyExperience blog I own, and edited in may 2018

Voir les commentaires

1 2 > >>